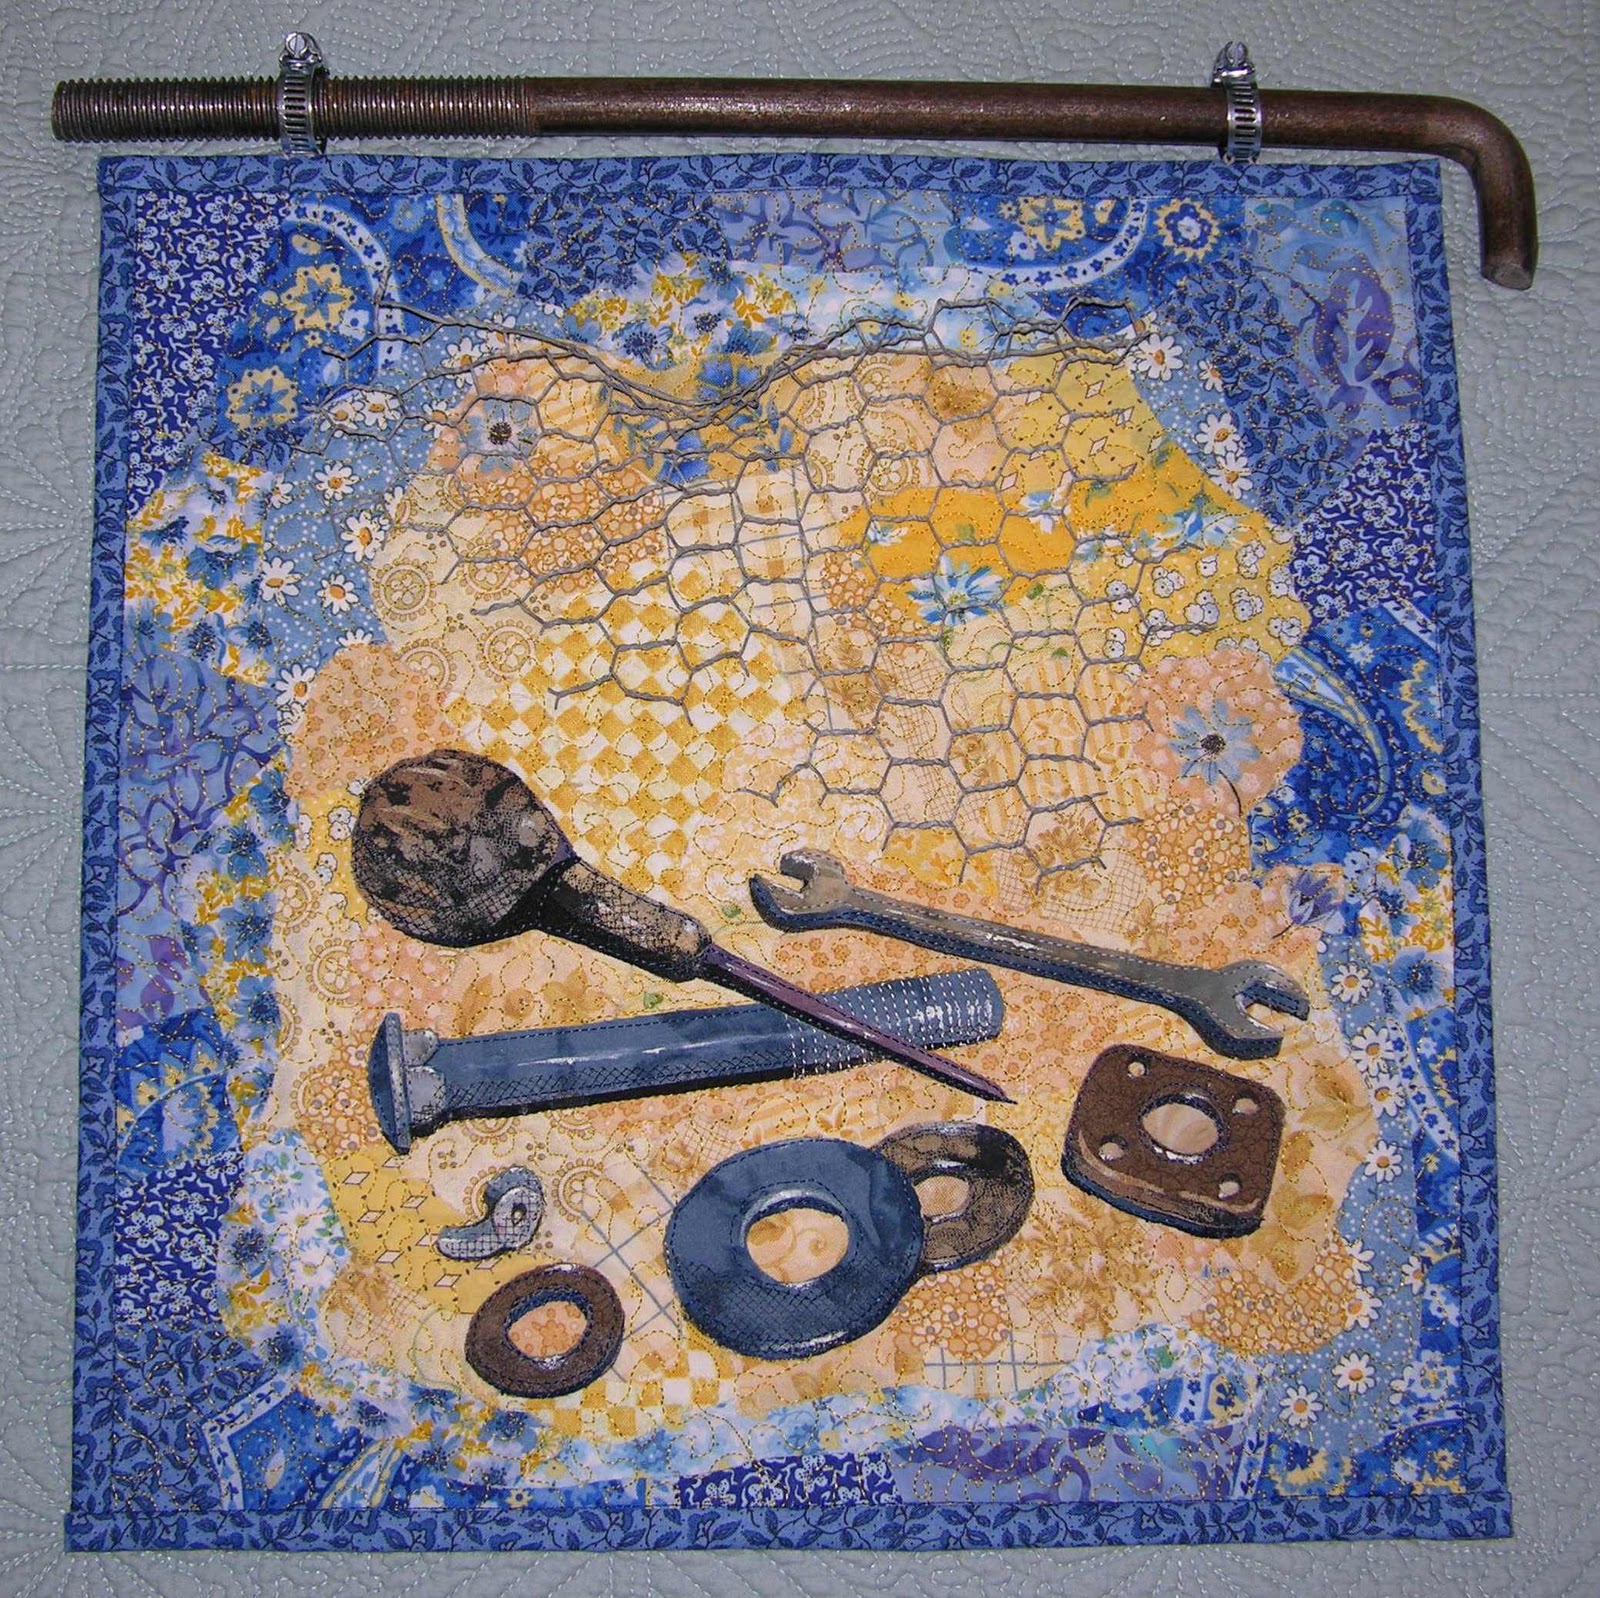
Finished Hardware Quilt
Somewhere, rattling around in the back of my mind, I kept thinking about how it might look if I used fabric to make the hardware. I could visualize it, but wasn't sure what technique I'd use to accomplish it. I figured using fusible pieces of fabric would work, but what kind of artsy background could I come up with. With all of this stuff still clunking and rattling around in my brain, as luck would have it, I received an Amazon package that contained two books that I'd ordered by artist Susan Carlson who does fabric collage using nearly confetti-sized (an admitted exaggeration here) pieces of fabric to construct her art quilts. Her first book, "Free-Style Quilts, A No-Rules Approach," and her second, "Serendipity Quilts," explain in words and in excellent photographs how she uses her technique. It sounds easy, it looks easy, but I found out that it ain't easy!!! However, after literally hours upon hours of playing with all manner of yellow scraps, I finally started getting a little more comfortable with the technique. Oh foolish one that I am, I stepped back and took a good look at the earnest beginnings of my new-found expression in art, and realized that it really wasn't all that easy to blend the fabrics so they looked cohesive, but were still interesting... Fortunately, because her technique uses just tiny spots of Aleene's Tacky Glue to hold the pieces in place, it's pretty easy to rip them off when you need to - unfortunately, I had to do a lot of that!!!
STEP-BY-STEP

Photo Set-Up

Photo of Photo...

I laid muslin over top of the photo and traced the design.

I made multiple copies of the pattern so I could cut out the individual pieces and use them as a pattern to cut them out of fabric. I used fusible web on the backs of all of the tools and hardware, and then cut them out and either pinned them in place or used the tip of a hot iron to tack them down in a couple of places.

I added a variety of yellow background pieces around the tools and hardware using small amounts of tacky glue to hold them in place. The edges of all fabric pieces, including the tools and hardware, are left un-glued so subsequent pieces of fabric can be slipped around and underneath the edges as needed. Some shading and highlighting fabrics have been added to make the objects appear more three-dimensional. I'm beginning to add the blue border.


The finished quilt, before adding the poultry netting (twisted metal chicken wire) to the top area. Small touches of white paint have been added for highlights on tools and hardware. Note that black netting fabric was used to add more shading to the lower areas of the tools and hardware pieces.

Hose clamps were used as loops to hang the quilt.

A large bolt was slid through the hose-clamp loops.
Although there was a real learning-curve with Susan Carlson's time-consuming fabric collage technique, I have to admit that I enjoyed every minute of it, and will definitely be using it again!


%2B(650x228).jpg)


Carolyn, this is an amazing piece of work! WOW!!! I love, love, love it. At first (before I began reading), I thought those were actual tools on the quilt! And hanging it on a pipe with clamps is the icing on the cake! You go, girl!! Hugs, Cathy
ReplyDeleteI totally agree with Cathy K. I, also, love the fact that you used a good many floral pattern fabrics showing traditional fabrics in a artistic setting.
ReplyDeleteI, too, think the tools look so real! Wonderful!!
ReplyDelete